Setting up a pedalboard is a rite of passage for many guitar players, but coming up with the perfect guitar pedalboard configuration is often easier said than done. There are a lot of different things to consider, and while experimentation through trial and error may work for some, it’s always good to have some pedal board layout tips to get you started.
There’s no one-size-fits-all correct way to set up a pedalboard, and many guitarists spend their whole lives experimenting and making changes to their boards. However, there are still plenty of things that you can do to optimize your layout. So, if you’re serious about giving your pedal board the best configuration possible, here is everything you need to know about how to optimize the layout.
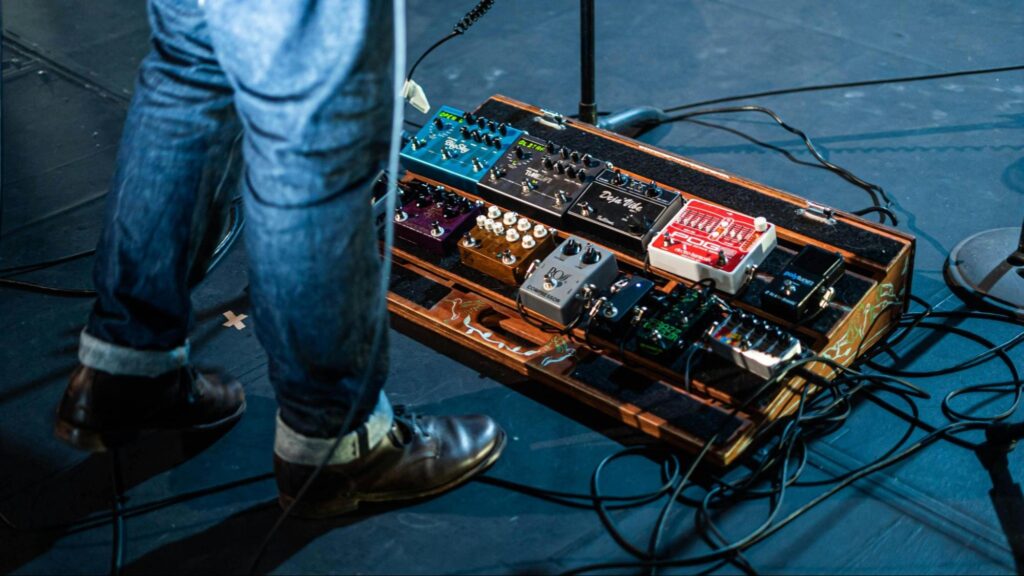
Before you start setting up your board, it’s important to go in with a thorough plan. Setting up a pedalboard is about a lot more than just keeping your pedals organized. It’s also about creating a functional, ergonomic layout that helps you create your ideal guitar tone.
For example, some of the most common problems that many guitar players have with their pedalboards include signal loss, humming, and having to constantly fumble around with tangled cords. While some issues may stem from faulty hardware, in most cases, planning your guitar pedal configuration and placement can prevent these problems entirely.
Pedalboard planning is also key to ensuring that your board is as easy to use as possible. Regardless of what size pedalboard you have, something as simple as placing the pedals you use the most at the bottom of the pedal deck, where they are easiest to reach, can go a long way to improving ergonomics and the efficiency with which you can turn pedals on and off.
In addition to performance and functionality, investing time into pedalboard planning up front also has the potential to save you significant time and money down the road. Ensuring that you don’t need to overstretch or twist cables in your setup means you won’t have to replace them nearly as often.
Now that you have a general plan along with the pedals you plan to put on your board, there are still a few other things you’ll need to think about and buy before you can start setting up your board.
The first thing you need to consider is how you’ll attach the pedals to your board. Velcro is by far the easiest, cheapest, and most popular option here, and it does work great, especially if you like to swap out your pedals every now and then. However, velcro does have its drawbacks, and many guitarists opt to use a higher-quality velcro alternative like 3M Dual Lock, which is stronger and offers more stability.
The second thing you’ll need to get are patch cables. Patch cables are small cables that connect pedals together and allow the audio signal to flow through your pedal chain. There are plenty of different types of patch cables, including cables with right-angle plugs, straight plugs, or a combination of both.
You’ll likely need zipties or low-profile cable clips. All it takes is a few strategically placed zipties to keep your cables tidy and in place anytime you set up or tear down your rig.
Another thing you need to consider when setting up your pedalboard is how you plan to power your pedals. There are essentially two different ways to do this, the first of which is the daisy chain.
Daisy chains are a popular option for beginners as they are cheap, easy to set up, and allow you to power multiple pedals through the same outlet. However, daisy chains come with a number of disadvantages, the first of which is that they often produce unwanted noises like humming, the longer the daisy chain gets. Additionally, daisy chains can only be used with pedals of the same voltage and polarity, meaning that you won’t be able to use one if you have any pedals that take more than the standard 9 volts.
For this reason, any optimal pedal board layout will use a dedicated power supply instead. These power supplies allow you to power each pedal individually, distributing power more evenly to each pedal and allowing you to power pedals of different voltages and polarities. This also solves the noise issue that’s common with daisy chains.
Still, this leaves the question of where to place the power supply on your board. While there is no single correct answer here, many guitarists simply place the power supply at the back of the pedal deck behind all their pedals. However, if you want to maximize pedal deck space and prevent any induced hum, by far the best place to put it is below the pedal deck.

First-time board builders often overlook the importance of pedal order. A pedal chain is exactly that: a chain, and every pedal that the audio output travels through will have a small effect on the sound produced. This means that getting pedal order right is important if you want to have the highest quality tone possible out of your guitar.
The vast majority of guitar players stick to a standard guitar pedal chain configuration, as this is the easiest way to ensure you have a pedal chain that works well right away. Here is what you need to know.
As you may have noticed, the standard pedal configuration doesn’t include any space for volume or EQ pedals. This is because these types of pedals are a bit more flexible and are more down to personal preference.
For example, if you like creating powerful swells, it may be best to place your volume pedal at the very beginning of your pedal chain. On the other hand, if you’re more concerned with controlling overall output, placing a volume pedal at the end of the chain is probably the best option.
The same goes for EQ pedals. If you want to shape the input before it reaches your gain and other effects, then place it earlier in the chain.
The important thing to remember is that there is no one-size-fits-all guitar pedal configuration. Once you have a solid understanding of the standard pedal order, you can and should encourage yourself to bend the rules and experiment with new guitar pedalboard ideas and different configurations.
One common problem with larger pedalboards is that the quality of the signal deteriorates the farther it has to travel. Buffer pedals, which preserve the strength and quality of this signal, are a great way to combat this, but you will need to plan where you want to put them on your board.
In general, if you want the best sound, you should use a buffer on any pedalboard with more than five pedals in the chain, but many guitarists disagree on which placement is best. Some say you should put your buffer between your guitar and the first pedal in your chain, while others claim it’s best to put it after your fuzz, overdrive, and distortion pedals.
Now that you have a handle on all the essentials, there are still a few general pedalboard layout tips that you can use to help optimize your board.
First, it’s always a good idea to experiment with potential layouts before attaching the pedals to your board. Arranging your pedals on the floor can give you a better idea of what the final result will look like and if it will feasibly fit on your board.
Secondly, consider which pedals you use most frequently when playing. If you use some pedals a lot more than others, it’s a good idea to place them at the front of your board where they are easiest to reach. This will speed up your ability to switch effects on and off while also cutting down the strain you put on your body while you play.

Are you looking for the perfect custom pedalboard? Give us a call or contact us on our website, pedalpad.com. Our team of custom board builders has extensive experience with guitar pedal configuration and planning pedal board layouts. It can help you design the perfect custom pedalboard that meets your specific needs as a player. Plus, with so many unique features and add-ons to choose from, you can trust that we’ll be able to bring your vision to life, no matter what guitar pedalboard ideas you have. So, don’t settle for some lesser mass-produced pedalboard when you could have something so much better. Contact Pedal Pad and take the first step toward building your new dream pedalboard today!